How to Create a Custom WordPress Login Form
Are you planning to create a custom, front-end login form for your WordPress website?
By replacing the generic WordPress login page with a custom front-end login form, you can add a touch of personalization and integrate your website’s branding into the form design.
This article will explore the steps to create a custom WordPress login form using ProfilePress. This powerful plugin allows you to design and integrate user-friendly WordPress login forms seamlessly.
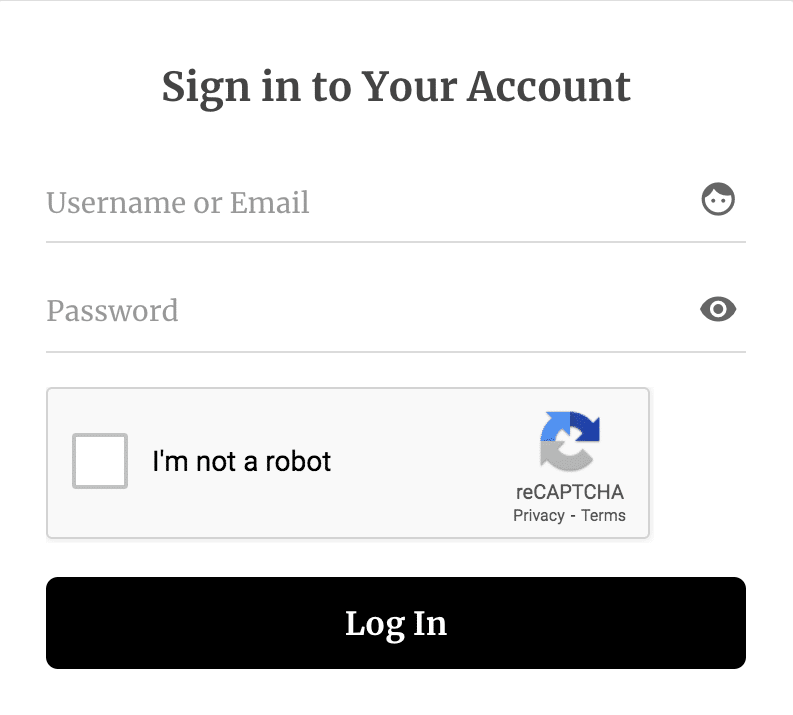
ProfilePress allows you to create a WordPress user login form that can be added to any page via shortcode.
Table of Contents
Using the Drag & Drop builder to Create a Custom Login Form
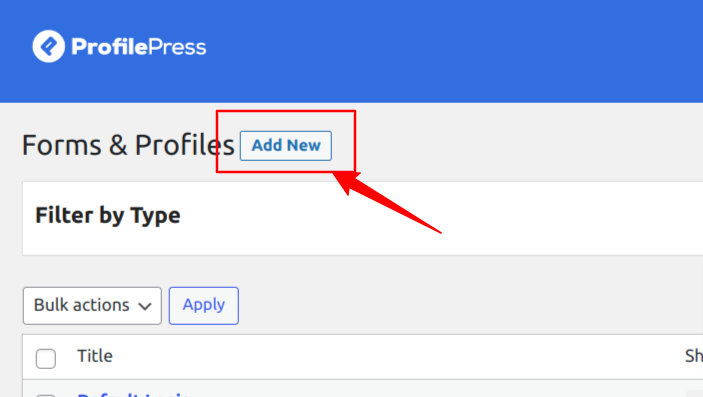
Navigate to ProfilePress>>Forms & Profiles and click the Add New button.
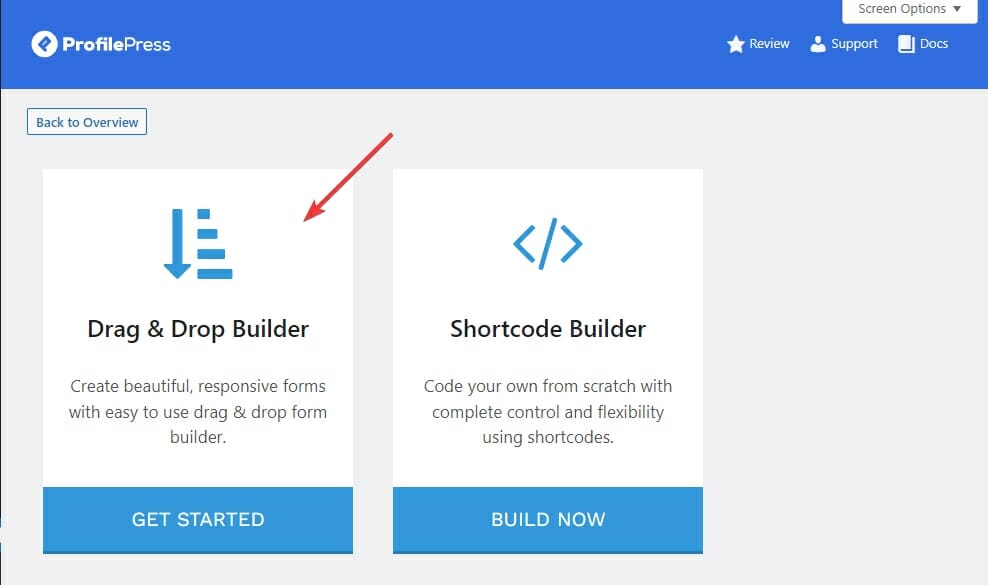
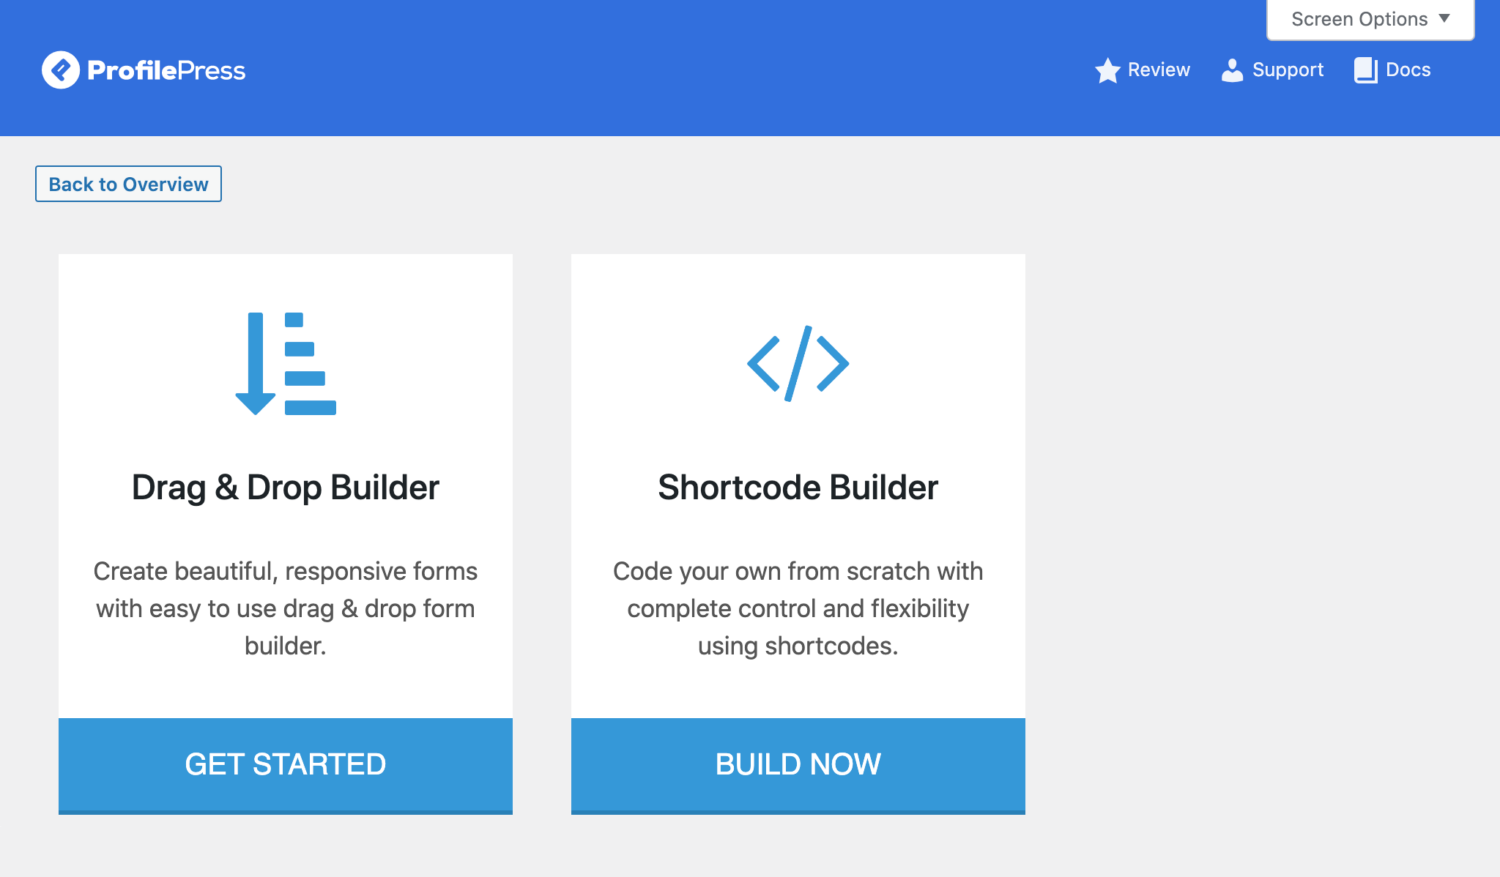
Here, you can choose between the Drag & Drop Builder and the Shortcode Builder. In this section, we will cover using the Drag & Drop Builder, so go ahead and click on the “Get Started” button beneath it.
Type in the desired name for your form and click on the Login tab.
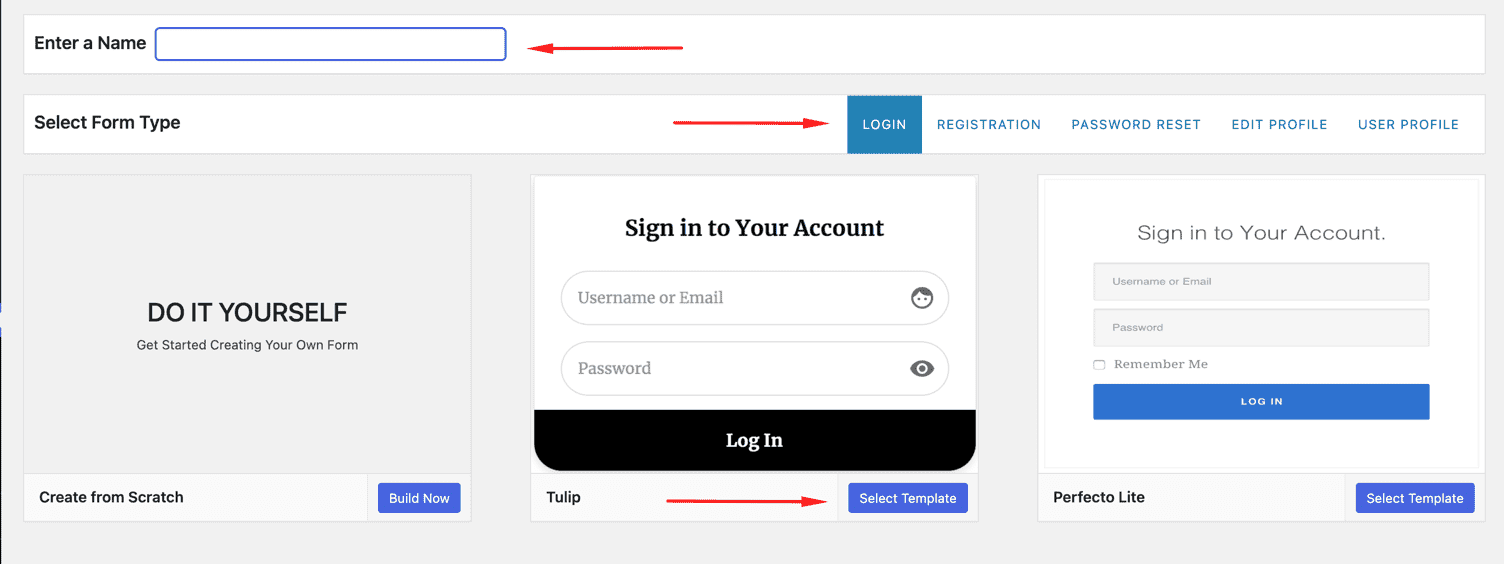
Next, select your desired template and use the drag & drop builder to customize the form using the intuitive drag & drop builder. This powerful tool allows you to effortlessly rearrange the form elements, such as text fields, checkboxes, dropdown menus, and more, simply by dragging and dropping them into place.
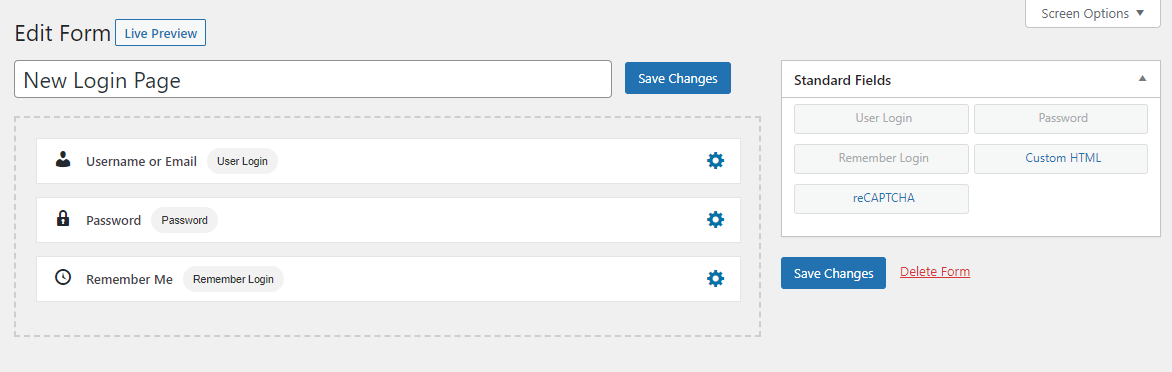
You can preview what the form will look like by clicking on the “Live Preview” button.
Customize Your Form’s Settings
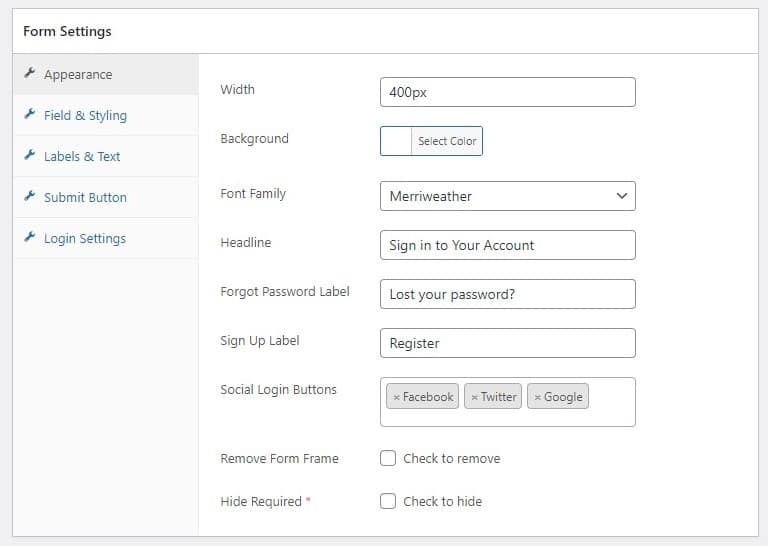
In Form Settings, you can modify the form’s headline, colors, button labels, and password reset settings. You can also choose the social login methods users can use to log in.
Incorporating these social login methods into your custom login form empowers users to access your website using their existing social media accounts, eliminating the need to create new credentials.
Once you have finished customizing your form, click on the “Save Changes” button to save your form.
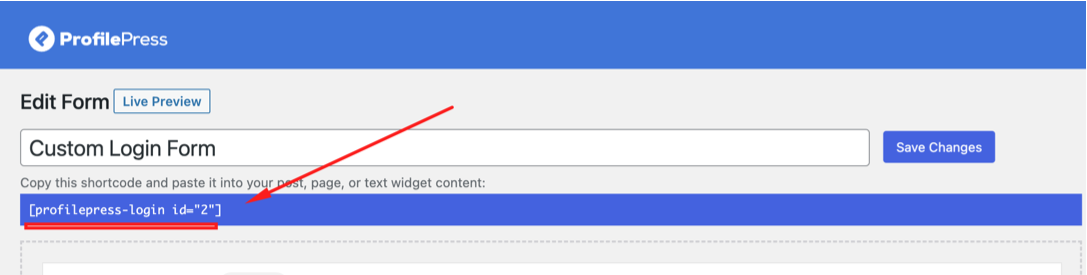
After saving the form, it is crucial to copy the shortcode that is conveniently displayed directly below the form title. This shortcode will be used in the next step, allowing you to seamlessly embed the form into any desired location on your website.
Using Shortcode Builder to Create a Custom Login Form
If you want more control over the form’s design, the shortcode builder allows you to add custom code to the form while using our field shortcodes to build your form. Please follow these steps to create the form.
Navigate to ProfilePress>>Forms & Profiles and click the Add New button.
In this section, we will cover using the Shortcode Builder, so go ahead and click on the “Build Now” button beneath it.
Type in the desired name for your form and click on the Login tab.
Next, select your desired template and use the shortcode builder to build and customize the form using shortcodes.

You can use the full potential of HTML and CSS, giving you total control of the form to achieve your desired visual and functional outcomes.
Once you have finished customizing your form, click on the “Save Changes” button to save your form.
After saving the form, it is crucial to copy the shortcode that is conveniently displayed directly below the form title. This shortcode will be used in the next step, allowing you to seamlessly embed the form into any desired location on your website.
NB: It is important to remember that when using the shortcode builder in ProfilePress, you should refrain from using a <form> tag. The inclusion and handling of the <form> tag are automatically managed by ProfilePress, eliminating the need for manual implementation.
Creating a Login Page
To showcase your newly created custom login form on your WordPress website, you’ll need to embed it into a new page. Follow these step-by-step instructions to create a new page:
In your WordPress dashboard, go to Pages>>Add New

Type a suitable name for the password reset page in the title field and paste the custom password reset form shortcode you previously copied above.
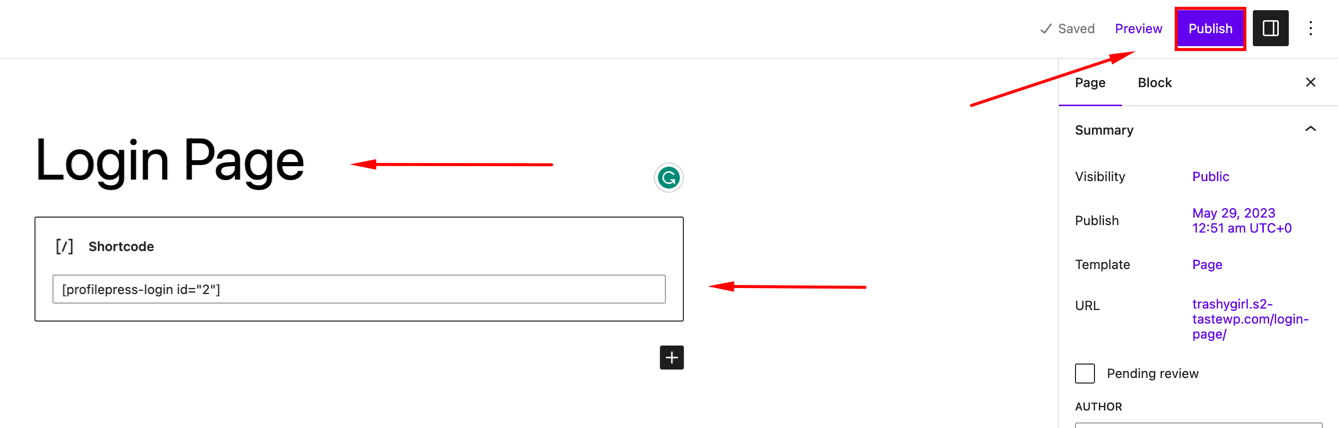
Click on the ‘Publish‘ button to save your page.
Setting the Default Login Page
After publishing your login page, you need to make it the default page in ProfilePress so users will be redirected to it when they are logging into your WordPress website.
To assign the newly created page as the login page, navigate to ProfilePress >> Settings >> General, then click on “Pages” in the vertical tabs.
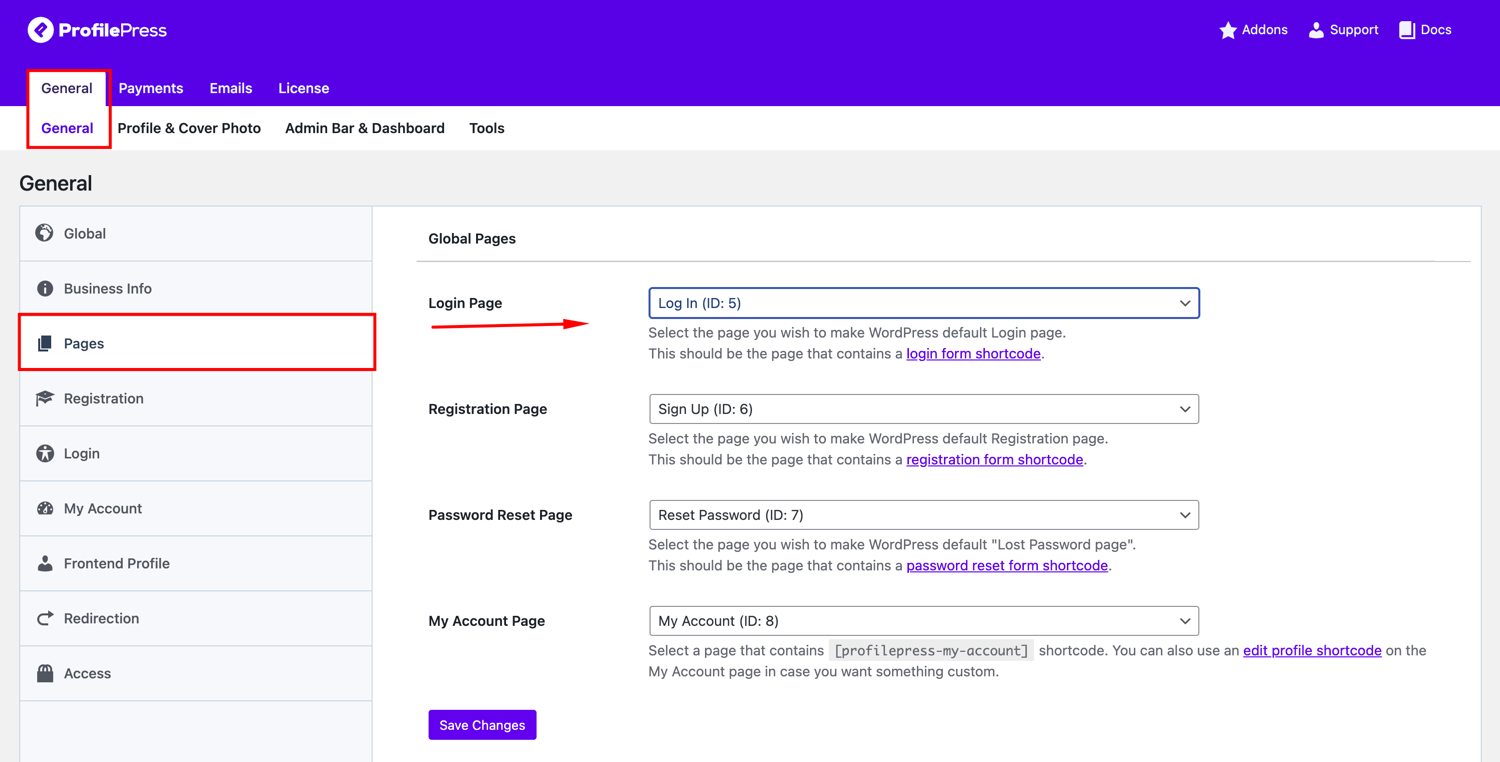
Locate the “Login Page” drop-down menu and choose the recently created page from the options. Finally, save your changes.
Having done that, all visits to http://yoursite.com/wp-login.php will be redirected to your front-end custom login page.
Conclusion
Creating a user-friendly custom login form is essential for any WordPress website. This can be achieved effortlessly using a plugin such as ProfilePress and following the step-by-step instructions outlined above.
With ProfilePress, you can seamlessly design and personalize login forms to match your needs and brand identity.
Whether you prefer the drag & drop builder or advanced shortcode builder, ProfilePress provides the flexibility and creative freedom to create login forms that suit your preferences.