Installation and Activation
When you buy our plugin, you are granted access to download and save them locally to your computer.
With the plugin downloaded, follow the steps below to get it installed on your WordPress-powered site.
Table of Contents
ProfilePress Installation
Login to your WordPress dashboard.
Navigate to Plugins > Add New and click on the Upload Plugin button.
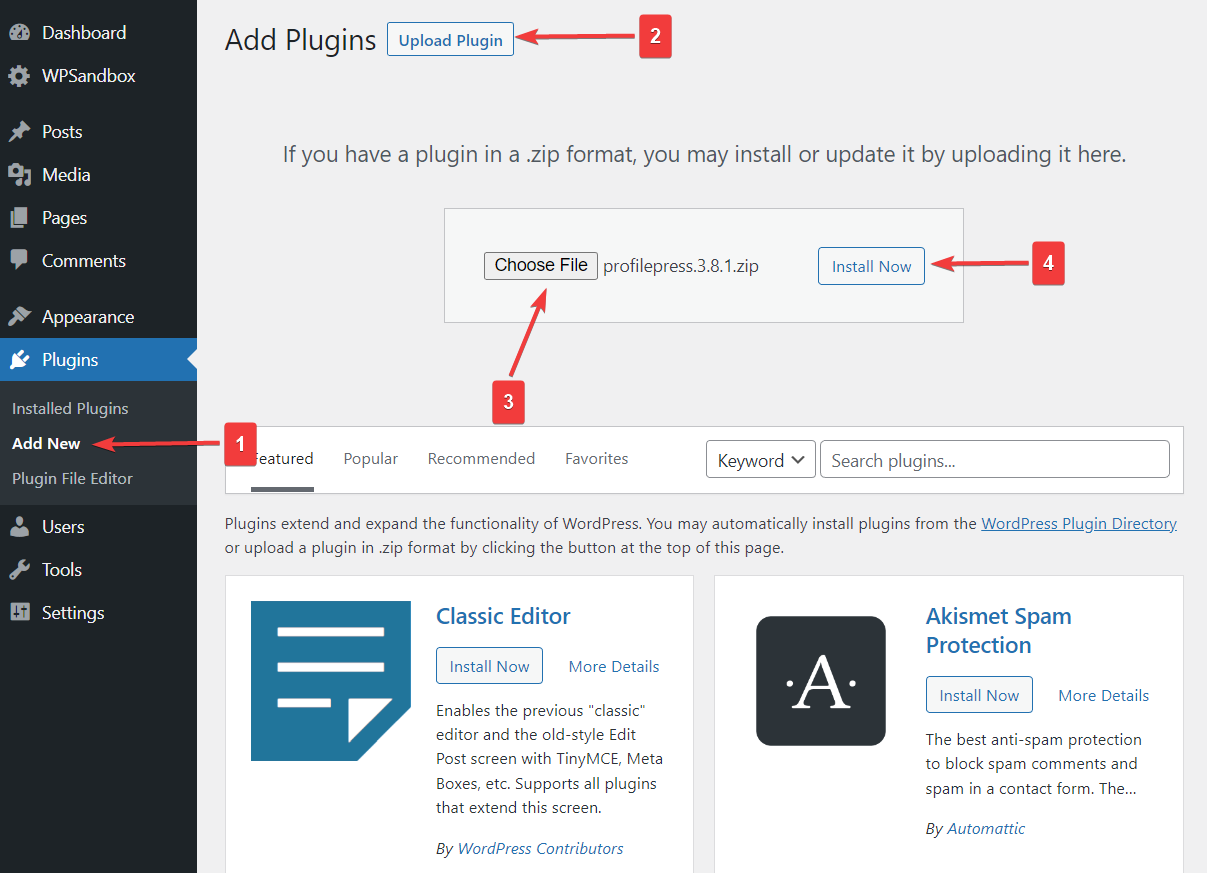
Choose the plugin zip file and click Install Now.
Once installed, click Activate.
Next is to activate your license key. If you don’t do this, plugin updates will not be delivered to your site. That is, you won’t be able to see updates nor apply the update from your WordPress dashboard.
To activate your license:
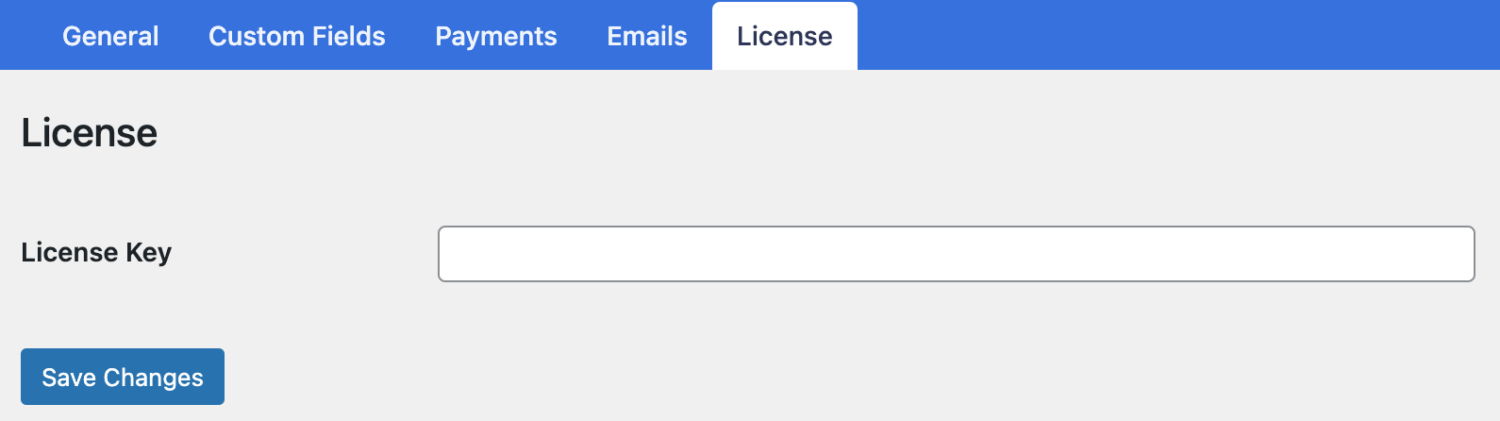
Click the Settings plugin menu, then open the “License” menu.
Enter your license key in the License Key field and hit the Save Changes button.
Finally, you need to clear the permalink by going to Settings >> Permalinks and hitting the “Save Changes” button.
Upgrading from ProfilePress Lite
If you have the ProfilePress free version now running on your site and you want to upgrade to any of our paid plans, follow the guide below.
1. Purchasing a ProfilePress License
To get started, you’ll need to visit our pricing page, which shows you all of the features available with our paid license levels.
Select a plan and go through the checkout to complete your purchase.
2. Installing the Paid ProfilePress Plugin
Once you’ve purchased a license, you can complete the upgrade process by adding your license key to your ProfilePress settings. This will install the paid version of the plugin for you.
You’ll need to log in to your WordPress site to start this process. Then go to ProfilePress » Settings. You should see a field to enter your license key on this page.
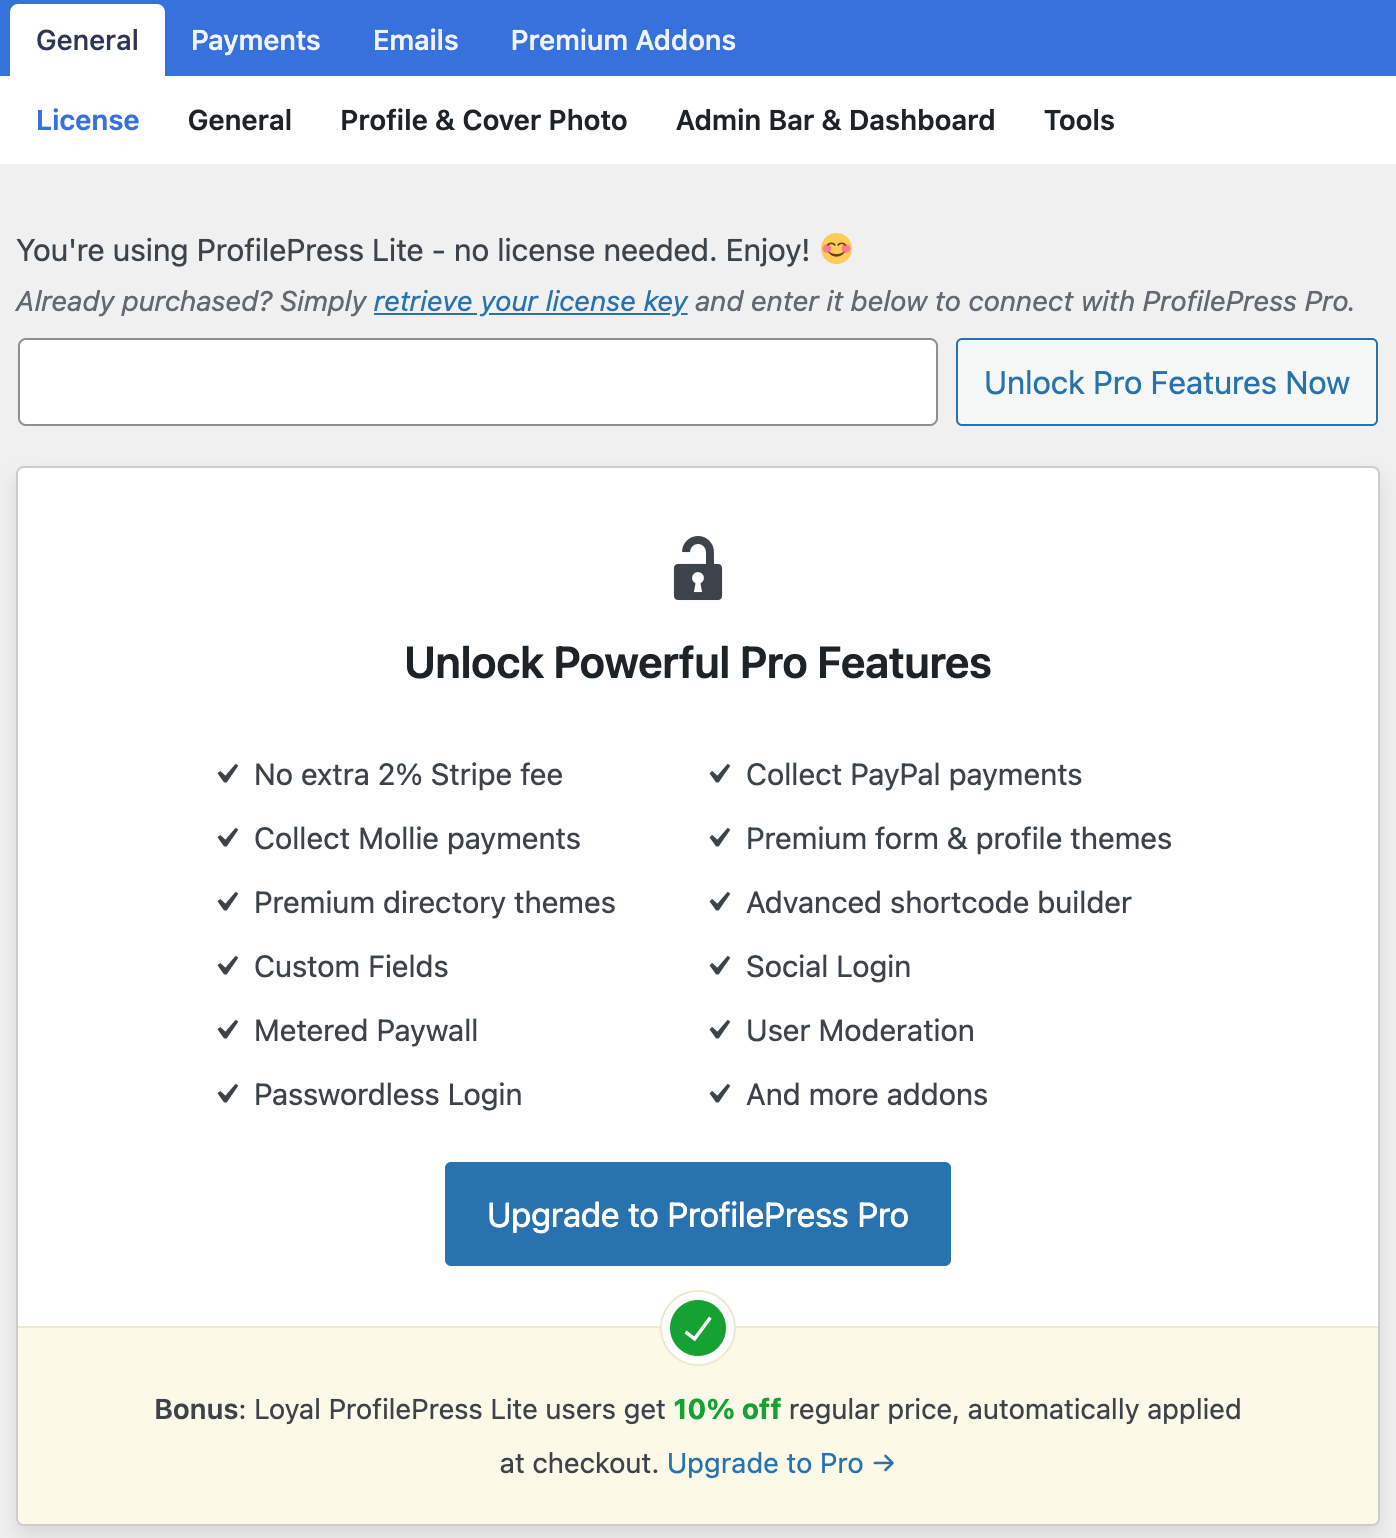
To find your license key, check your email after your purchase or log in to your ProfilePress account in another browser tab.
Then paste your license key into your ProfilePress settings and click the Unlock Pro Features Now button.
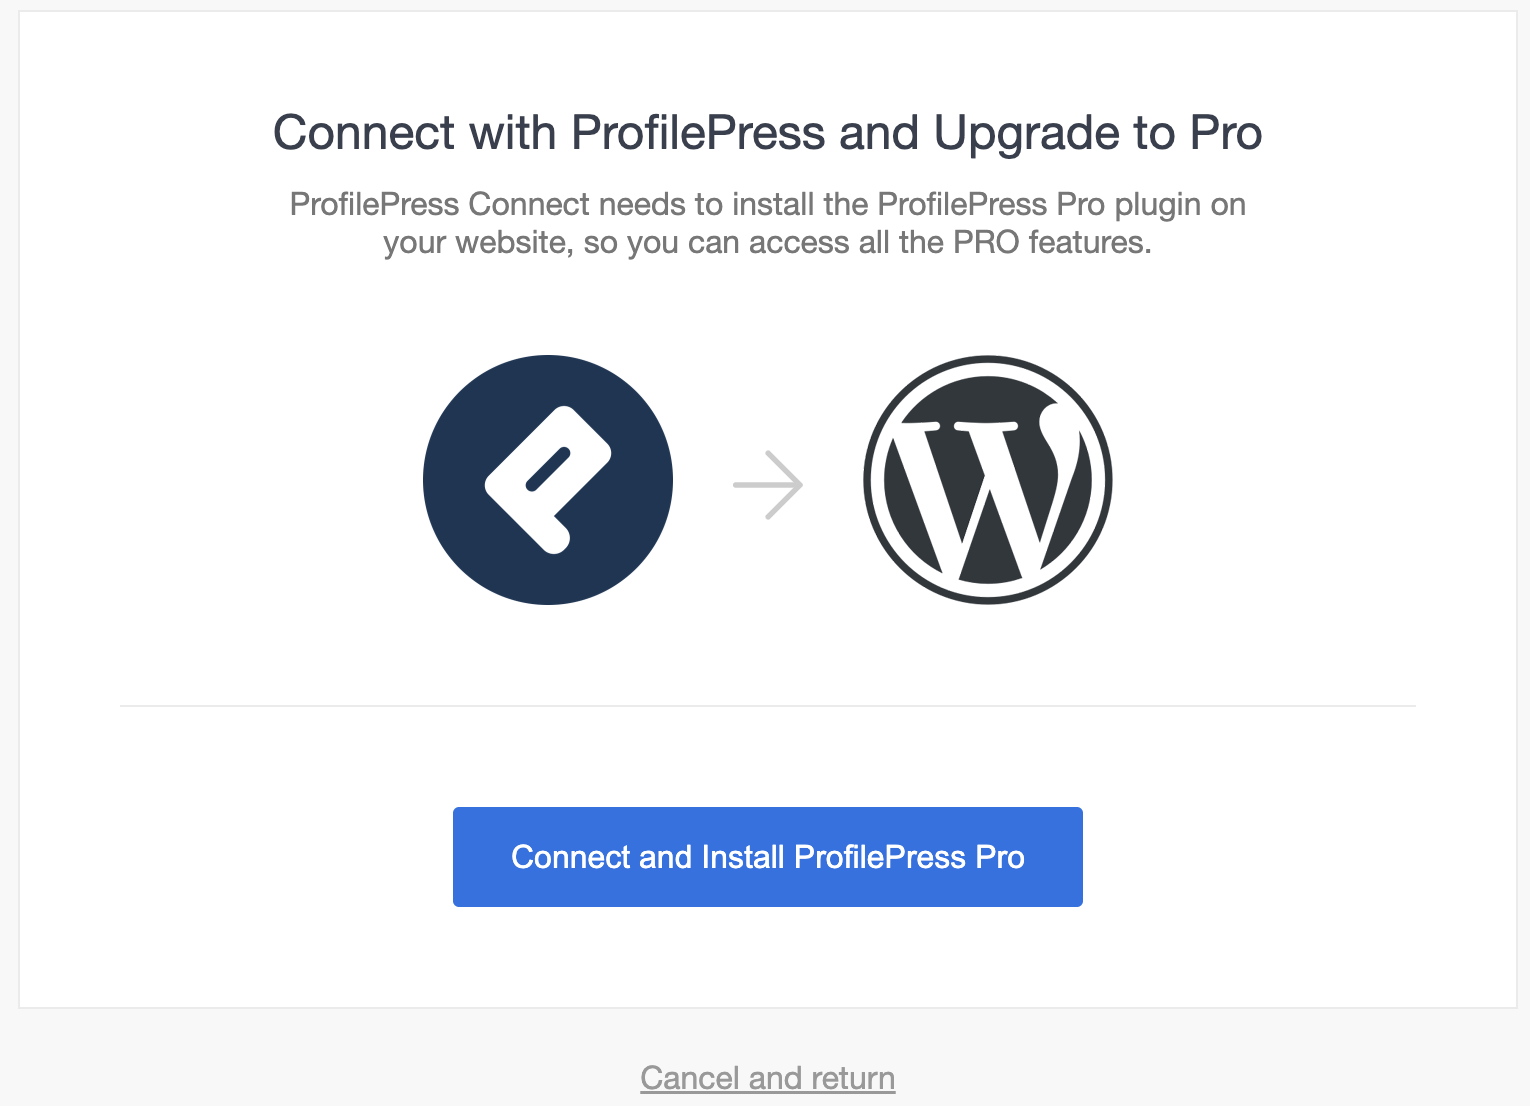
The automatic verification process will then run. As soon as your license key has been verified, you should be taken to a new screen to confirm that you’d like to proceed.
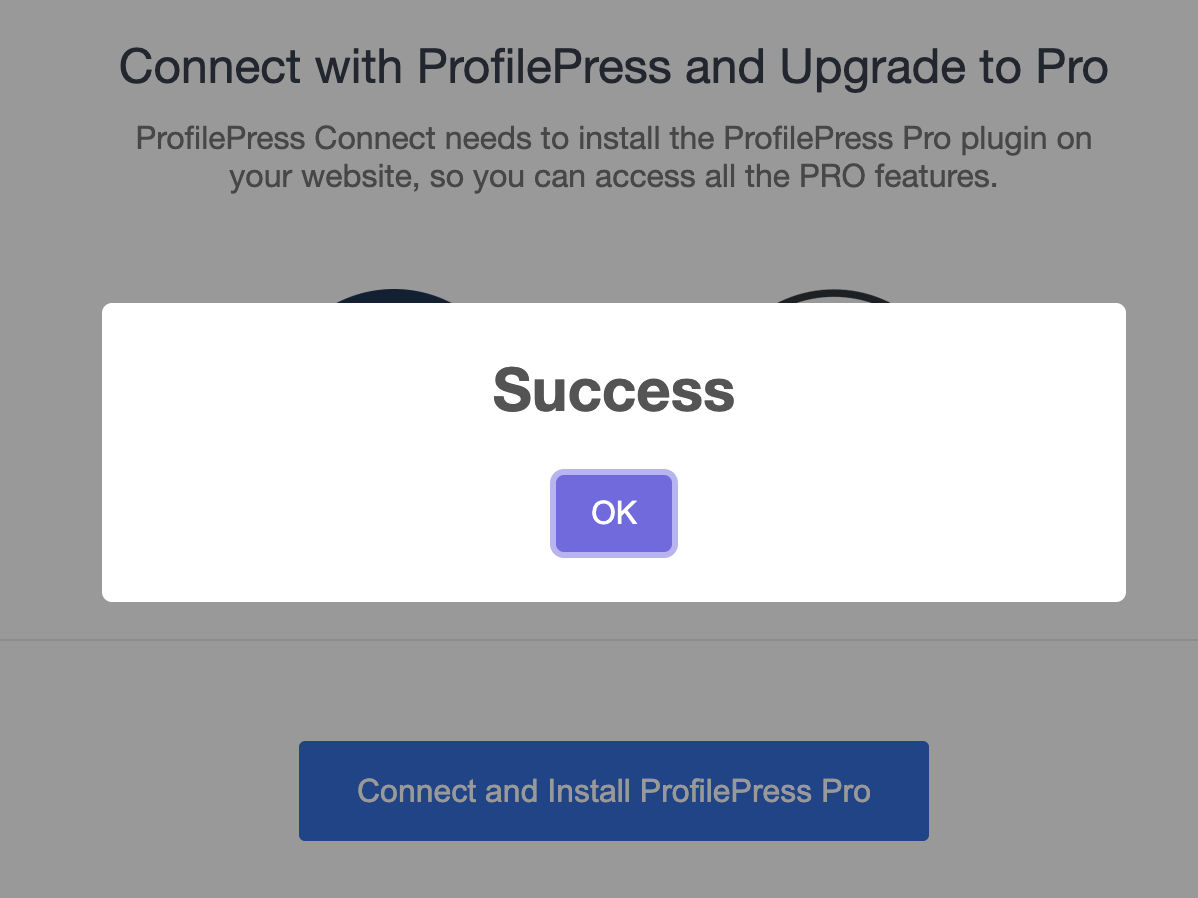
To begin the installation process, you’ll need to click the Connect and Install ProfilePress Pro button.
Next, the paid plugin will be automatically installed for you (this may take a few moments). Once it’s all done, you’ll see a success message.
If the automatic installation fails, your host may have restrictions that prevent it from running. You’ll need to manually install the paid version of the plugin instead. See our above on how to manually upload and activate ProfilePress.
After you click the OK button, you should be redirected back to the ProfilePress settings for your WordPress site. The paid version of ProfilePress is all set and ready for you to use!
La fin!