Subscribe Registering WordPress Users to Mailchimp List
The Mailchimp addon allows you to subscribe WordPress users to a specific email list or audience immediately after they register via your custom registration form.
You can also allow registering users to select the Mailchimp list they want to be subscribed to.
To get this addon working on your website please refer to this article.
Table of Contents
Setting up List Selection
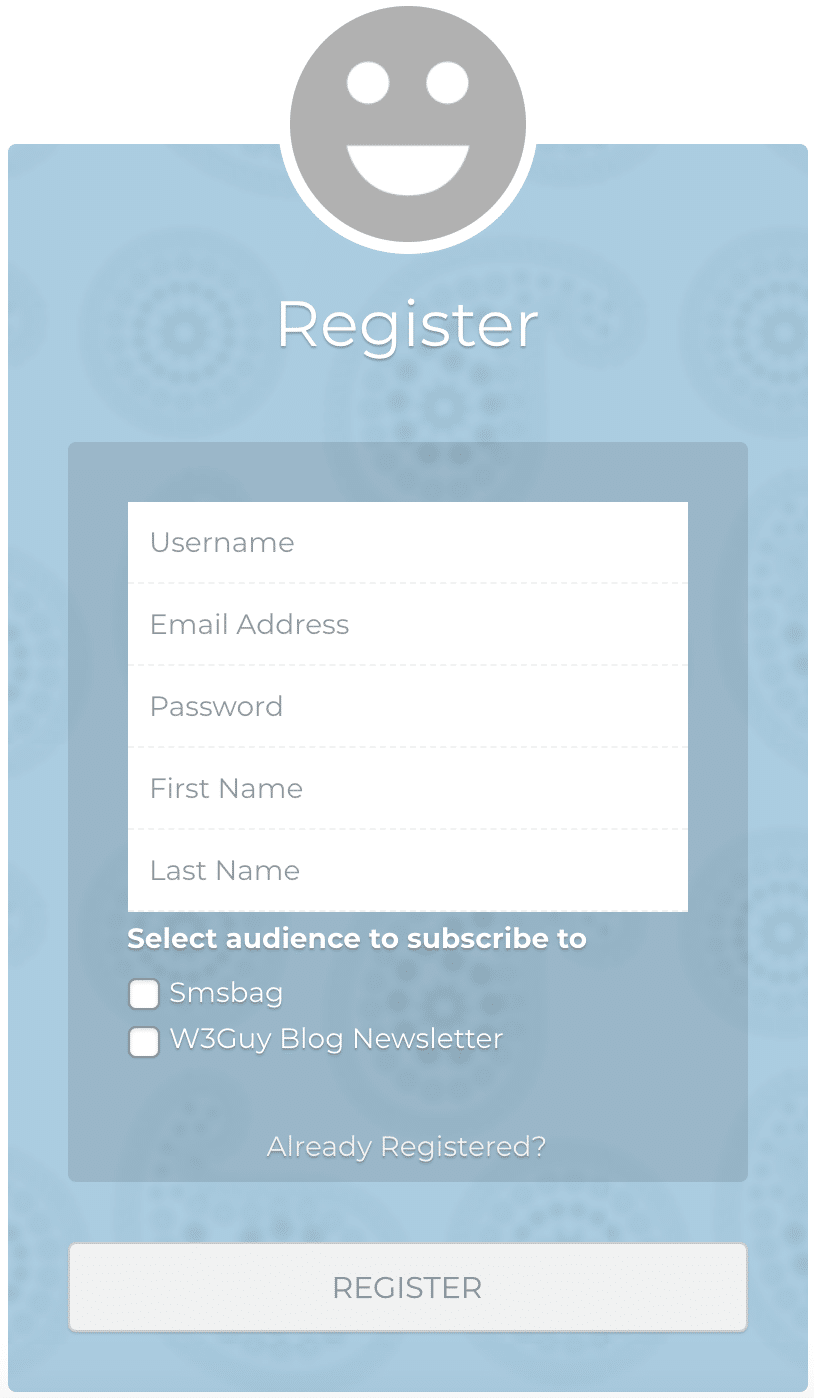
To let users select the list or audience to join, you have to add the Mailchimp block or shortcode to your registration form.
Drag & Drop Builder
Open your registration form builder or create a new one.
Drag and drop the Custom HTML field to the location you want to add the list selection
Click on the gear icon and type a description for the lists (eg. Select a List to Join) and click “Apply Changes”
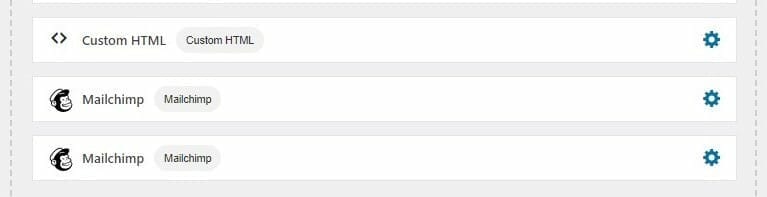
Next, drag and drop the Mailchimp field and click the gear icon to select the audience and enter a label for the checkbox field (or leave it empty to use the audience title).
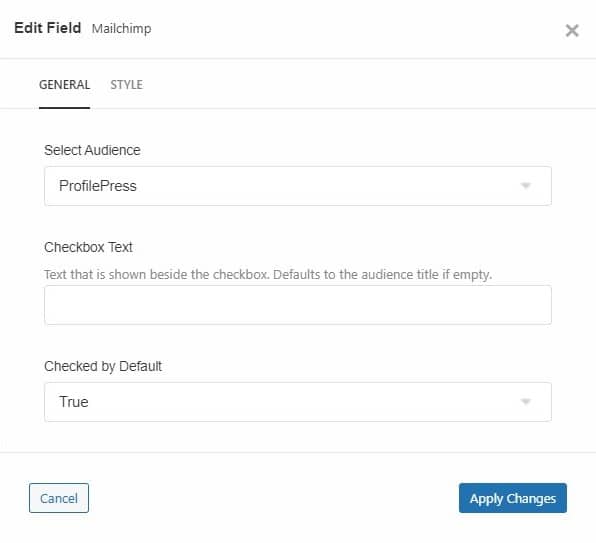
You can also choose to make the field checked by default.
Repeat the above steps for every audience you want to display on your registration form.
Don’t forget to save your changes.
Shortcode Builder
Open your registration form or create a new one
Write the description for the lists wrapped in say, a paragraph tag (eg. <p>Select a list to join</p>)
To add the Mailchimp shortcode that will display the subscription checkbox on your form:
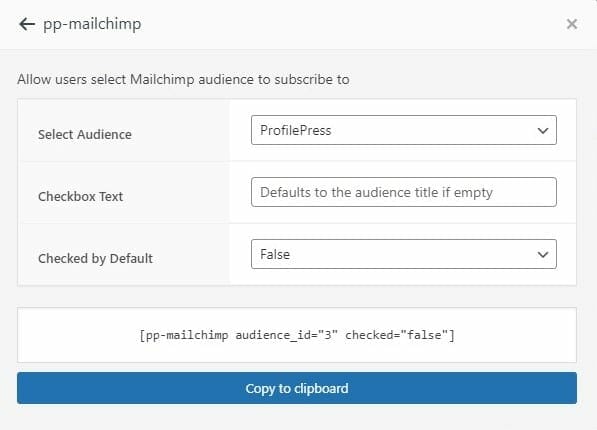
- Click on Available Shortcodes and scroll to and select pp-mailchimp
- Select an audience.
- Enter a checkbox text or leave it empty to use the audience title.
- Choose whether to select this option by default
- Click on “Copy to Clipboard“
- Paste the code right below your list description in step 2
- Repeat step 3-8 for each audience (list) you want to display on your form.
- Save changes
Note: Each list must have its own audience created on the settings page. See: Setting Up Mailchimp Addon