Setting Up Two-Factor Authentication (2FA) in WordPress
The Two-Factor Authentication (2FA) addon gives your WordPress website an extra layer of security by requiring more than just a password to log in. This protects your site against users using weak passwords, automated password guessing, and brute-force attacks.
With the ProfilePress Two-Factor Authentication addon, you can enable 2FA for any WordPress user role and enforce users of that role to use it whenever they are logging in.
Table of Contents
Activating the Addon
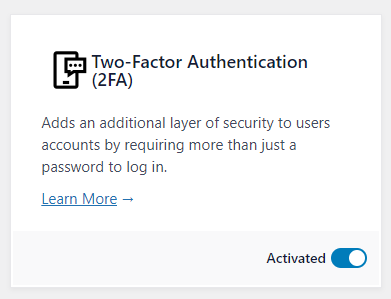
To activate the Two-Factor Authentication addon, go to ProfilePress>>Addons, Scroll to Two-Factor Authentication, and switch it ON.
The Setup
After enabling the addon, you can find the Two-Factor Authentication settings by going to Settings >> Two-Factor Authentication.
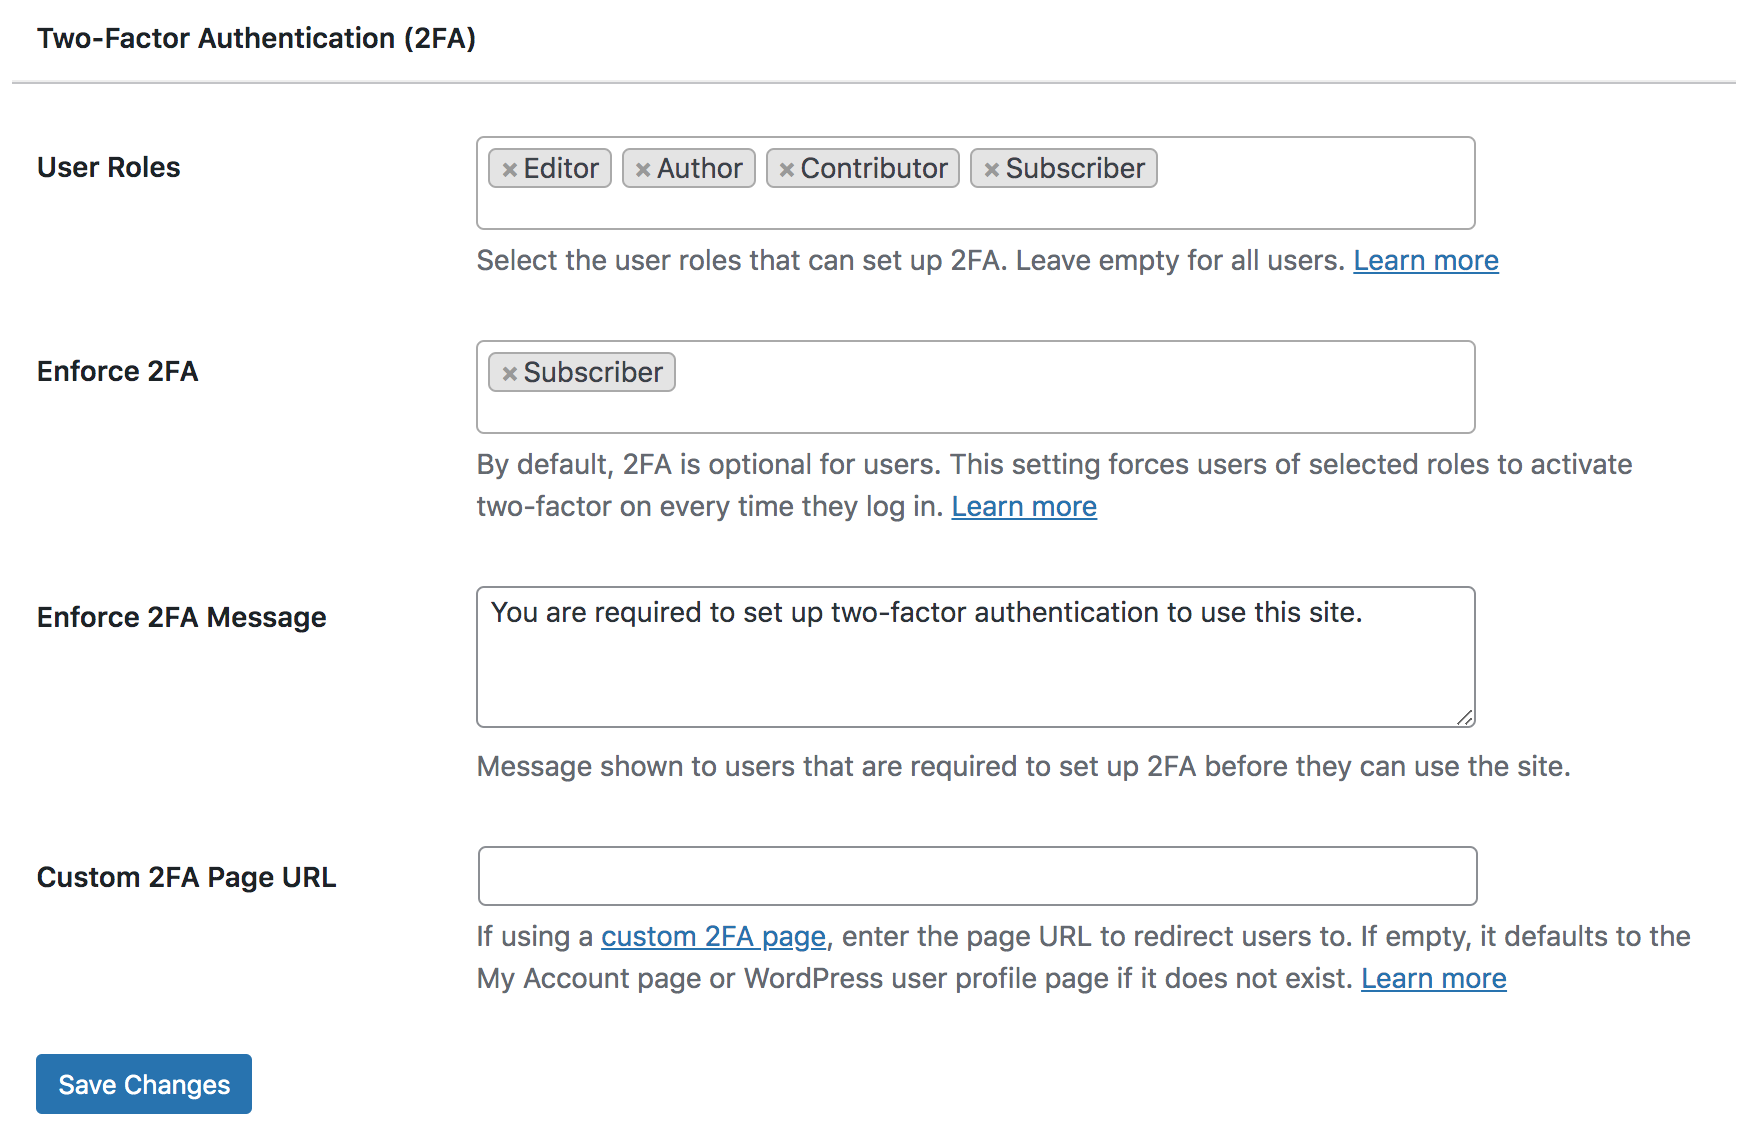
User Roles: Select all the user roles you want to activate 2FA for. If you leave the field empty, 2FA will be applied to all user roles.
Enforce 2FA: By default, 2FA is optional for users. If you want to enforce 2FA on all or select user roles, adding them in the field will force them to set up 2FA every time they log in.
Enforce 2FA Message: This is the message shown to users that are required to set up 2FA before they can use the site.
Custom 2FA Page URL: When using a custom 2FA page, add the URL here to redirect users to that page otherwise leave it empty to use the My Account page.
Adding 2FA to your Account
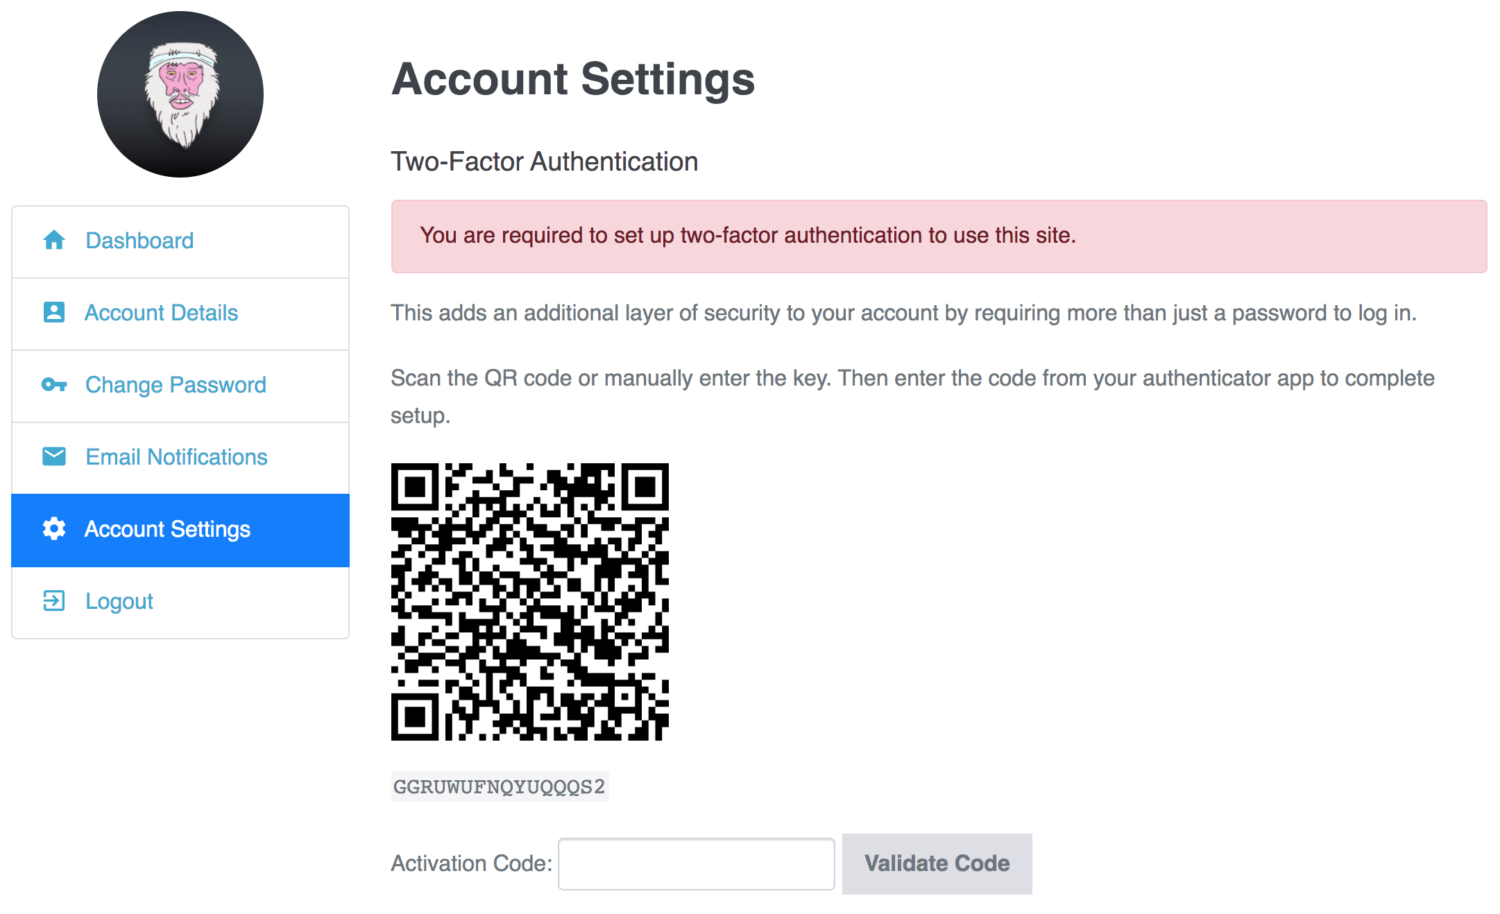
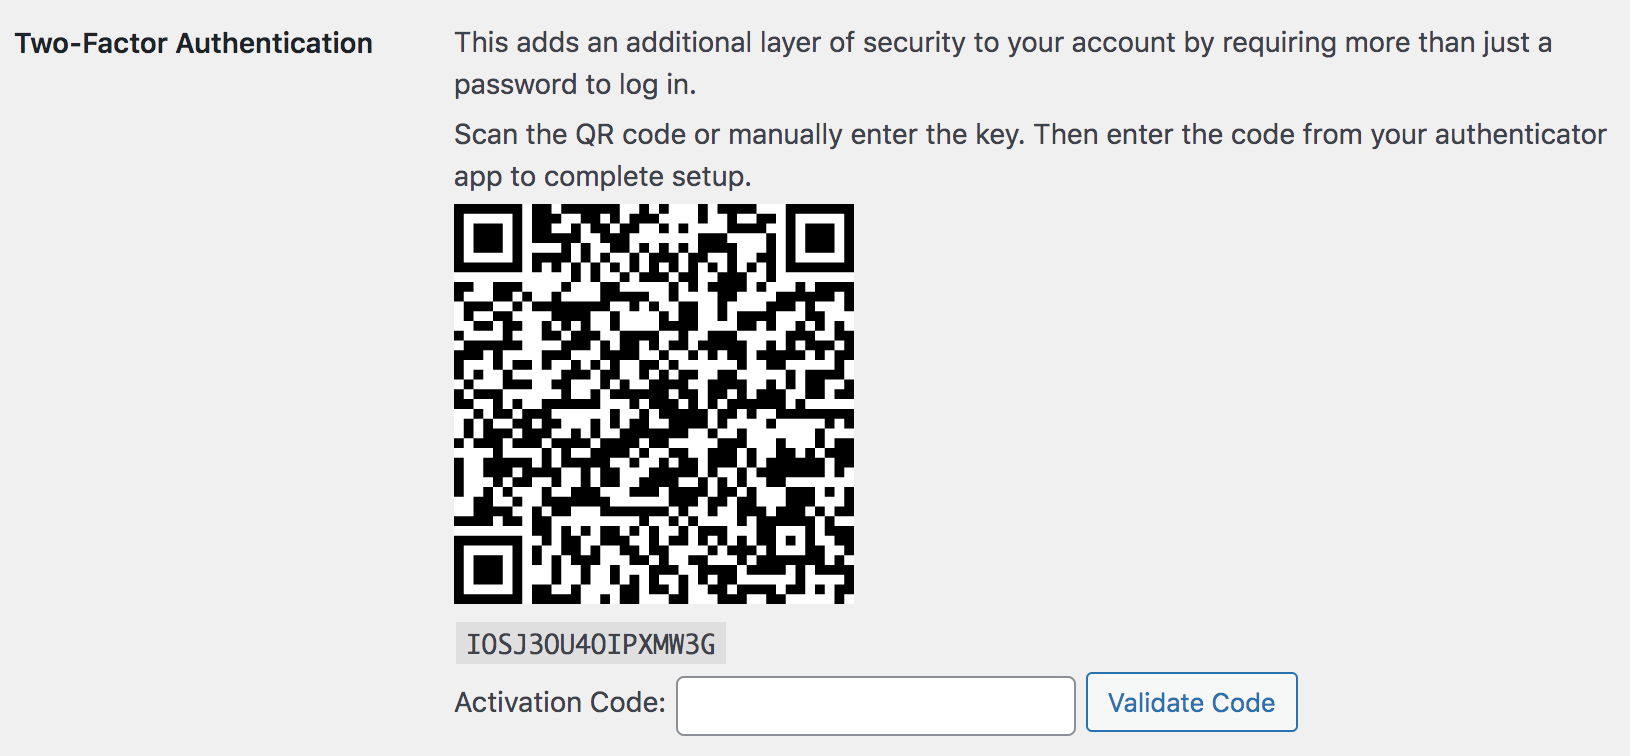
When users log in they will be redirected to the 2FA setup page where they will be required to add two-factor authentication using any of the available 2FA apps such as Google Authenticator, Authy, Microsoft Authenticator, 1Password, LastPass, Okta Verify, Duo Security.
Users can set up 2FA for their account either from the “Account Settings” section of the My Account page…
…from the WordPress admin profile page or
…from a custom user 2FA configuration page when you use the shortcode [profilepress-2fa-setup].
Steps to add 2FA
- Open your chosen app (Google Authenticator, Authy, & any other 2FA app.) and add an account
- Scan the QR code or manually type the key beneath the QR code shown.
- Enter the code provided by the authenticator app in the activation field and click on “Validate Code”
- That’s it
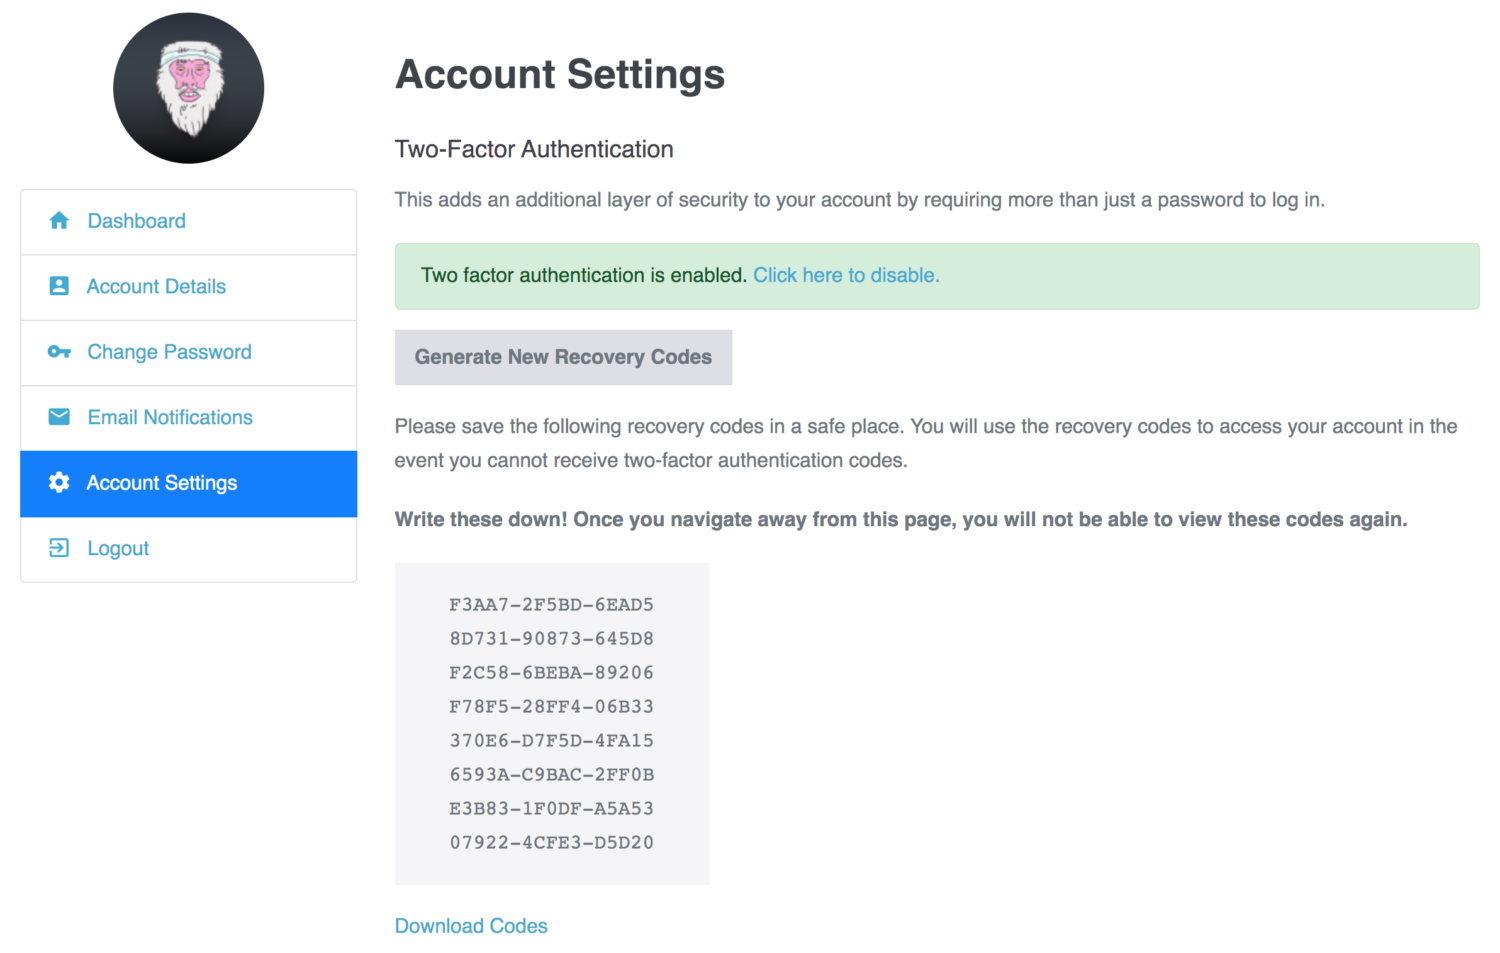
Backup or Recovery Codes Feature
When you successfully add 2FA to your account, you can generate and download recovery codes or backup codes that can be used as an authentication code to access your account in case you lose access to your 2FA app or your phone.
NB: You should either copy the codes down or download them and keep them in a safe place, as you can not view them again after navigating away from the page.
Disabling 2FA for Locked-Out Users
If a user gets locked out of their account, perhaps because they lost their phone or mistakenly deleted their authenticator application, as an administrator, you can disable 2FA for them from the user edit screen in the WordPress admin dashboard.
Adding 2FA Support to Login Forms
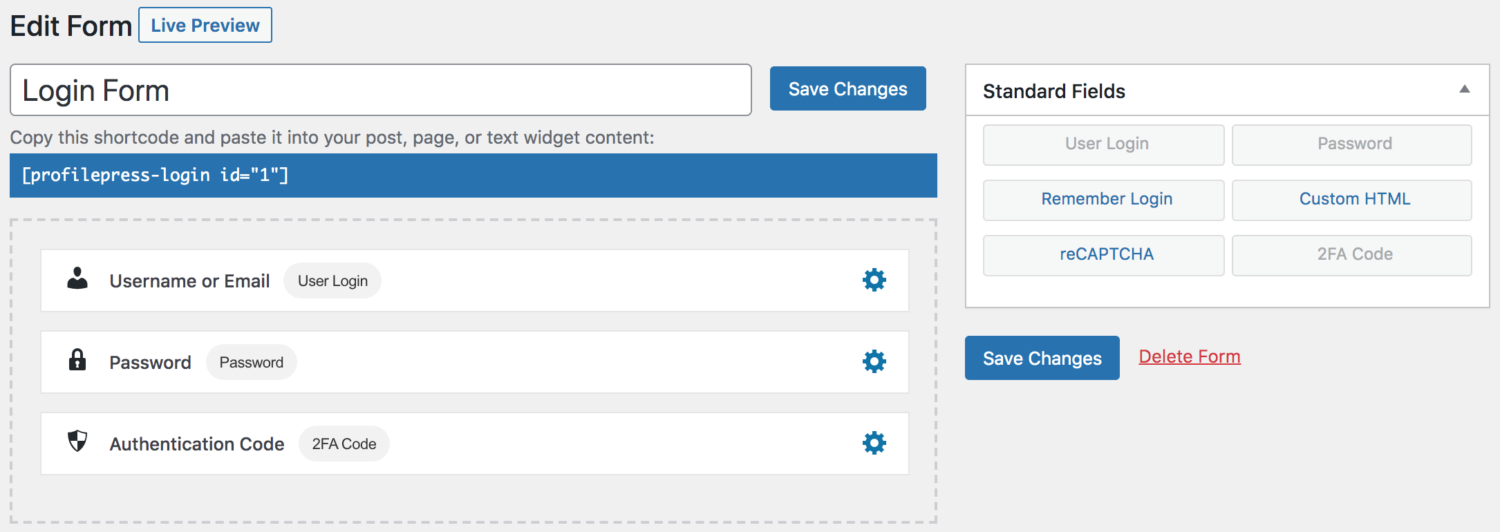
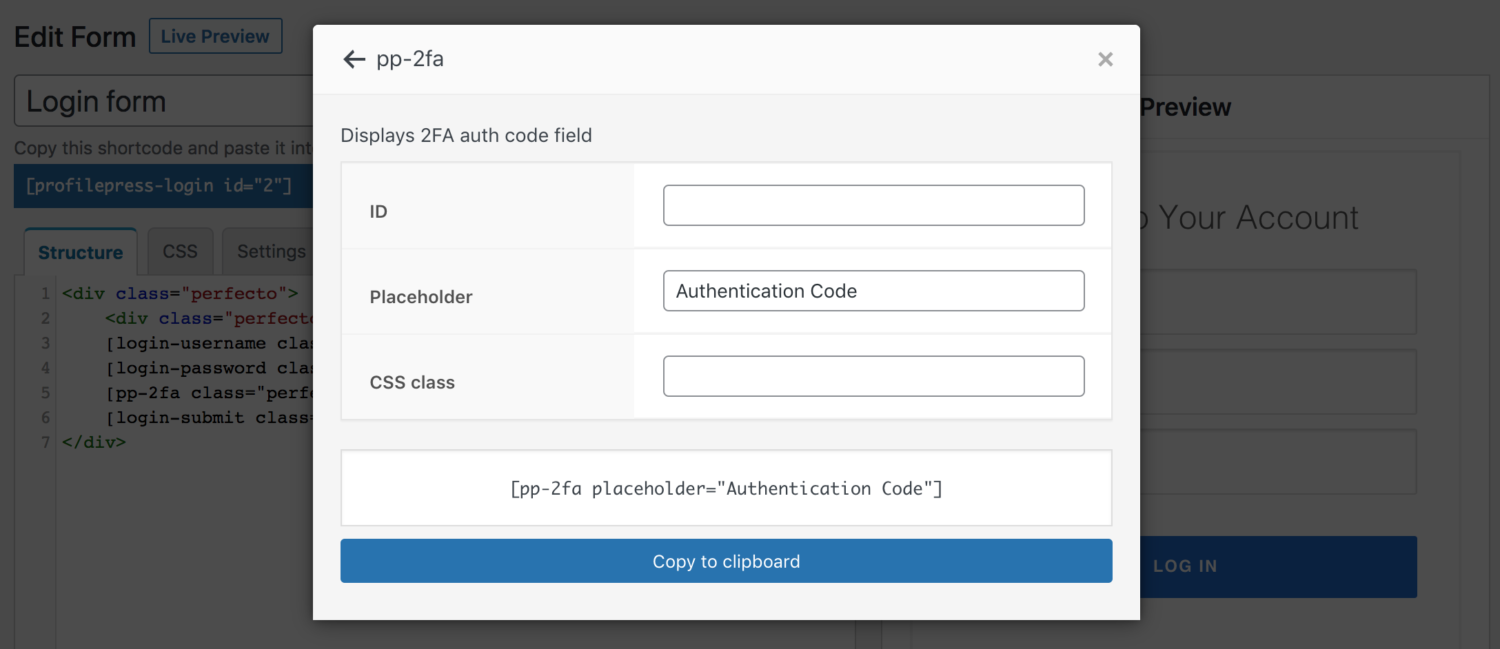
Finally, you need to add a field to your frontend login form where users can enter their authenticator code.
If the login form was created with the drag-and-drop builder, add the 2FA Code field.
And if using the advanced-shortcode builder, add the [pp-2fa] shortcode to the form.
Don’t forget to save the changes.
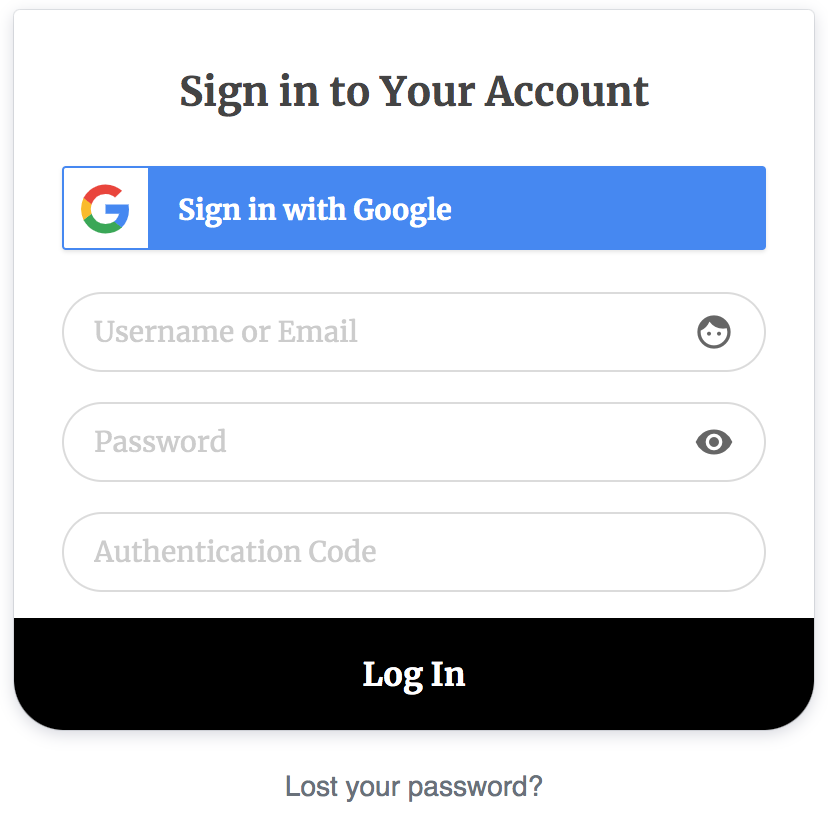
When a user who has configured Two-Factor tries to log in with their email and password, the field for them to enter an authentication code would be revealed.
La Fin.